Clipchamp Unveiled: A Close Look of its Video Editing Capabilities
Videos are a great way to share new ideas with others. However, making videos exciting and informative takes time and can be challenging. You need a good platform with many cool features to make your videos awesome. Clipchamp is a platform where you can improve your videos by adding cool things and making changes.
This post will show all the things Clipchamp can do so you can make your videos look amazing. It will teach you how to use Clipchamp's features and present the advantages and disadvantages. Without further ado, please continue reading the following parts.

SEITENINHALT
Bevor wir schreiben – so testen wir Software für unsere Beiträge:
Disclaimer: All the content on our website is written by humans in our editorial team. Before writing, we do deep research about Clipchamp. Then, it takes us 1-2 days to test it. We test Clipchamp from main functions, use cases, guide if each function, pros & cons, etc. To make our test more comprehensive, we also view review websites, like G2, Trustpilot, etc., to gather real users’ experiences for reference.
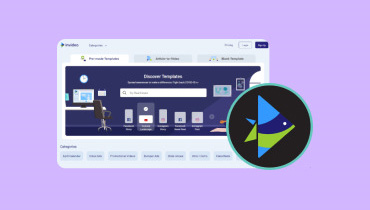
Part 1. What is Clipchamp
First, let us learn what is Clipchamp. Clipchamp is an easy-to-use online tool that lets you improve your videos to make them look better and more polished. You do not need to download any complicated program - just open ClipChamp in your web browser and start editing. It works quickly and well, so you can make your videos look excellent. Whether you are making a video for your website, social media, blog, teaching something, or editing fun moments to share with your friends online.
Teil 2. Wie man Clipchamp verwendet
Using ClipChamp is a breeze and lets you do many neat things with your videos! Here's how to get started with some popular features:
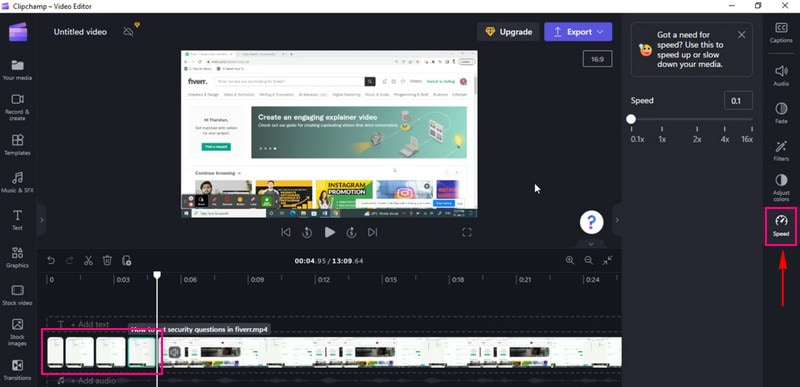
Clipchamp Video rückwärts abspielen
Reversing a video on Clipchamp is like making it play backward, like a rewind button for your video. To do this, rely on the steps below on how Clipchamp reverse video:
Step 1. Hit the Import Media button to upload your video.
Step 2. Once your video is imported, you will see it on a timeline. Click and release the video onto the timeline.
Step 3. Click the Speed button and lower the speed. Manually cut the video into frame by frame and then rearranged the clips.
Step 4. Rearrange the order by putting the last clip to the first, and so on.
Step 5. Once you are satisfied with the reverse video, you can preview your reversed video. Ensure it looks the way you want.
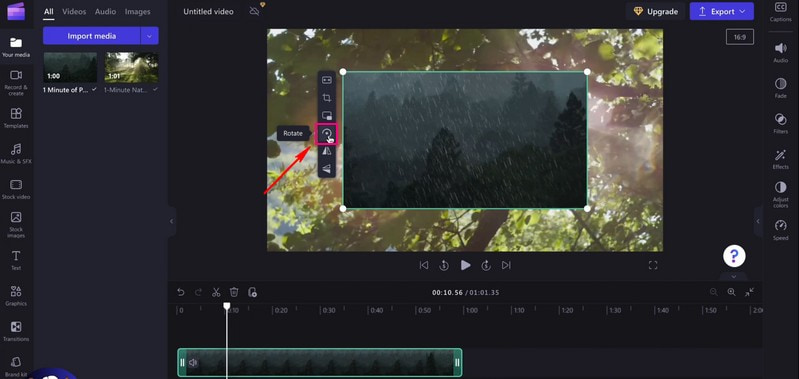
Clipchamp Video drehen
Rotating a video in Clipchamp is like turning it around to a different angle, just like flipping a picture. It is an excellent way to change how your video looks. To do this, count on the steps below on how Clipchamp rotates video:
Step 1. Click the Import Media button to upload your video.
Step 2. When the video is imported, please drag it onto the timeline.
Step 3. Click the video on the timeline; an option will appear on the left side of the footage.
Step 4. Select the Rotate, and choose whether to rotate your vertically or horizontally based on your requirements.
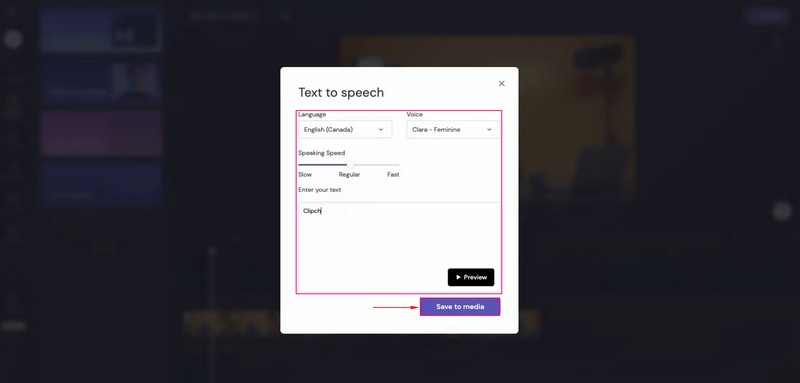
Clipchamp Text-zu-Sprache
Text to Speech in Clipchamp is like giving your words a voice. It is a fantastic way to make your video talk. Imagine typing words, and then your computer speaks them aloud in a video. To use Climpchamp text-to-speech, rely on the steps presented.
Step 1. Press the Import Media to upload your footage.
Step 2. Once your footage is added, please place the video into the timeline.
Step 3. Click the Record & Create button, and select Text to Speech from the list presented.
Step 4. You will see an option to choose a Language and your preferred Voice; please select one from each option.
Besides that, you can control the Speaking Speed, whether Slow, Regular, or Fast. Once chosen, proceed to enter the text. You can listen to your text-to-speech by clicking the Preview button.
Step 5. When satisfied, click the Save to Media button, and the recording will automatically be uploaded to the media tab. Add the recording to the timeline by dragging it under your imported video.
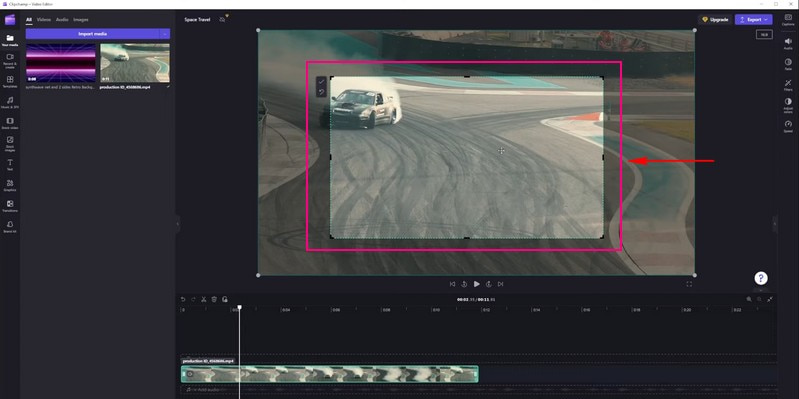
Clipchamp Video zuschneiden
Clipchamp's crop video feature lets you cut out parts of your video you do not want. If you do not like or want to show something in your video, you can quickly eliminate it. To discover how Clipchamp crops video, count on the steps provided.
Step 1. Hit the Import Media button to upload your video clip.
Step 2. Once the video is imported, please drag and drop the video clip to the timeline to start cropping.
Step 3. Click the video to see various editing features on the left side. Please select the Crop button; it is under the Fill button. You can adjust the left side of your video, the right margin, the bottom margin, and the top of your video.
Step 4. Press Enter on your keyboard to isolate the crop area. You can arrange the cropped video on any placement on the screen.
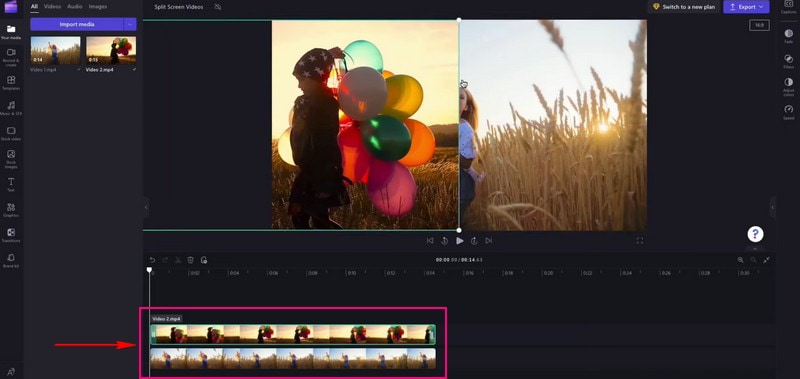
Clipchamp Split-Screen
Using the split screen feature in ClipChamp is like putting two videos next to each other on the same screen. It can be cool to show two things at once in your video. To master how Clipchamp split screen, please continue reading.
Step 1. First and foremost, set the Aspect Ratio according to your requirements.
Step 2. Click the Import Media button to upload the video you want to see on one screen. Then, point and drop them straight on the timeline.
Note: Ensure that the videos are on top of each other and not beside each other. Besides that, ensure that they have the same length.
Step 3. Click on the first video on the timeline. Then, drag the video to move it to the left or the right screen. Afterward, you will see the prompts on the stage to show when it is centered.
Step 4. Do the same process with the second video until you are satisfied with the placement.
Note: If any videos do not fit perfectly, crop them and move them into place by clicking the crop button.
Clipchamp Video trimmen
Clipchamp's trim feature helps remove parts of your video you do not want. Imagine if your video has a beginning you do not like or an ending that is too long. Please continue reading to learn how the Clipchamp trim video works.
Step 1. The first thing you need to do is to upload the video you want to trim by clicking the Import Media button.
Step 2. The video will be placed under the Media tab. Drag and drop the video clip onto the timeline.
Step 3. Hit the video clip you want to trim; it will be highlighted in green when clicked.
Step 4. Drag the green sidebars of the clip left or right to trim the video. Ensure to delete any gaps that form. If your clip has background audio, it will be trimmed as well.
Teil 3. Vor- und Nachteile von Clipchamp
Vorteile:
- Es ist einfach und erfordert keine fortgeschrittenen Kenntnisse zur Videobearbeitung.
- Benutzer müssen nichts herunterladen; es funktioniert in Webbrowsern.
- Benutzer können ihre Videos trimmen und Effekte, Text, Musik und mehr hinzufügen.
- Das Bearbeiten von Videos geht schnell, was den Benutzern Zeit spart.
- Es bietet Vorlagen, die Ihre Videos professionell aussehen lassen.
- Benutzer können in Echtzeit gemeinsam an Videos arbeiten.
- Benutzer können Videos in verschiedenen Formaten speichern und teilen.
- Die Webcam-Funktion ermöglicht es Benutzern, Videos direkt über den Webbrowser aufzunehmen und zu bearbeiten.
Nachteile:
- Es verfügt nicht über sehr fortgeschrittene Bearbeitungsfunktionen.
- Die kostenlose Version fügt Ihren Videos ein kleines Wasserzeichen hinzu.
- Die Verarbeitung der Videos dauert etwas länger.
- Der Export von Videos nimmt viel Zeit in Anspruch.
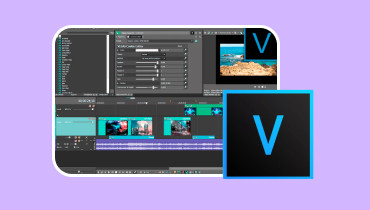
Teil 4. Clipchamp-Alternative
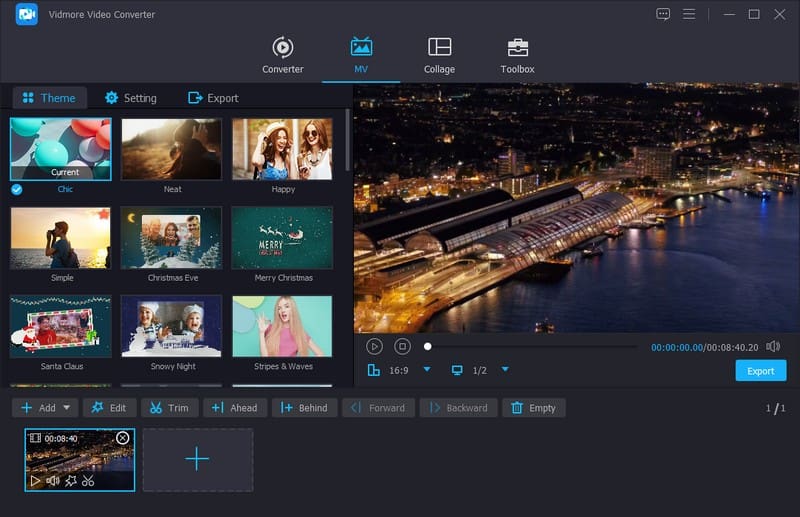
Regarding enhancing your videos, the Vidmore Video Converter stands out as an excellent Clipchamp alternative for editing. It offers many features to help you easily enhance your videos. It has comprehensive tools to make your videos look their best.
Vidmore Video Converter lets you do similar things, such as cutting and rotating parts, combining videos, and adding special effects. Besides that, you can add captions, titles, background music, and more. It aims to make your videos look better. Its versatility and features make it a top choice for anyone seeking an effective and dependable solution for editing videos. So, if you are searching for another way to edit videos, try Vidmore Video Converter.
Teil 5. FAQs zur Clipchamp-Bewertung
Is Clipchamp free?
Ja, Clipchamp hat eine kostenlose Version, die du ohne Bezahlung nutzen kannst. Allerdings hat die kostenlose Version einige Einschränkungen und kann ein kleines Wasserzeichen zu deinen Videos hinzufügen.
Does Clipchamp have a watermark?
Ja, wenn du die kostenlose Version von Clipchamp verwendest, wird deinen Videos ein kleines Wasserzeichen hinzugefügt. Dieses Wasserzeichen ist wie ein kleines Etikett, das zeigt, dass das Video mit Clipchamp bearbeitet wurde.
Why is Clipchamp so slow?
Langsames Internet, große Dateien, ein nicht unterstützter Browser und viele gleichzeitige Nutzer sind einige der Gründe, warum Clipchamp langsam arbeitet.
Is Clipchamp safe?
In der Tat ist Clipchamp sicher zu verwenden. Es ist eine seriöse Plattform, die von vielen Menschen zum Bearbeiten von Videos genutzt wird.
Why is Clipchamp not exporting?
Große Dateien, langsames Internet, technische Probleme, Browserprobleme und eine ausgelastete Serverkapazität sind einige der Gründe, warum Clipchamp nicht exportiert.
Fazit
Clipchamp video editor is a helpful tool for making videos more extraordinary. It is easy to use in your web browsers, and you can add effects, cut parts, and even make videos talk. Remember, it is suitable for fun videos and simple edits. If you want an alternative tool for Clipchamp, you can use Vidmore Video Converter. It works offline and offers basic and advanced editing features!